


For added peace of mind, Beko large appliances are eligible for our 10 Year Beko Parts Guarantee
Read More 4.2 out of 5 rating from
over 44541 reviews

We are proud to be the UK's number one large home appliance brand, rated 4.2 out of 5 on Trustpilot.
93% of consumers
recommend Beko
We are proudly recommended by 93% of our customers on Feefo, an independent reviews platform with verified feedback.
How to Set your Animated Text LCD Display
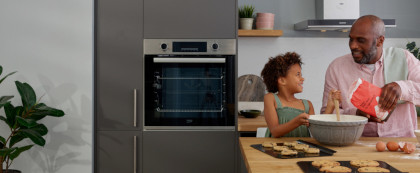
If you’ve recently purchased a Beko built-in oven and aren’t quite sure how to set its animated Text LCD display, we’ve put together this handy how-to guide to help you. This guide will show you how to set the language and time, as well as the alarm to help you keep track of your food as it cooks. And, we’ll show you how to set the cooking time too, to help you set your food to cook at a time that’s convenient for you and your busy family home. If your oven comes with an LED display instead, follow our LED display setup guide.
Setting the Language and Time
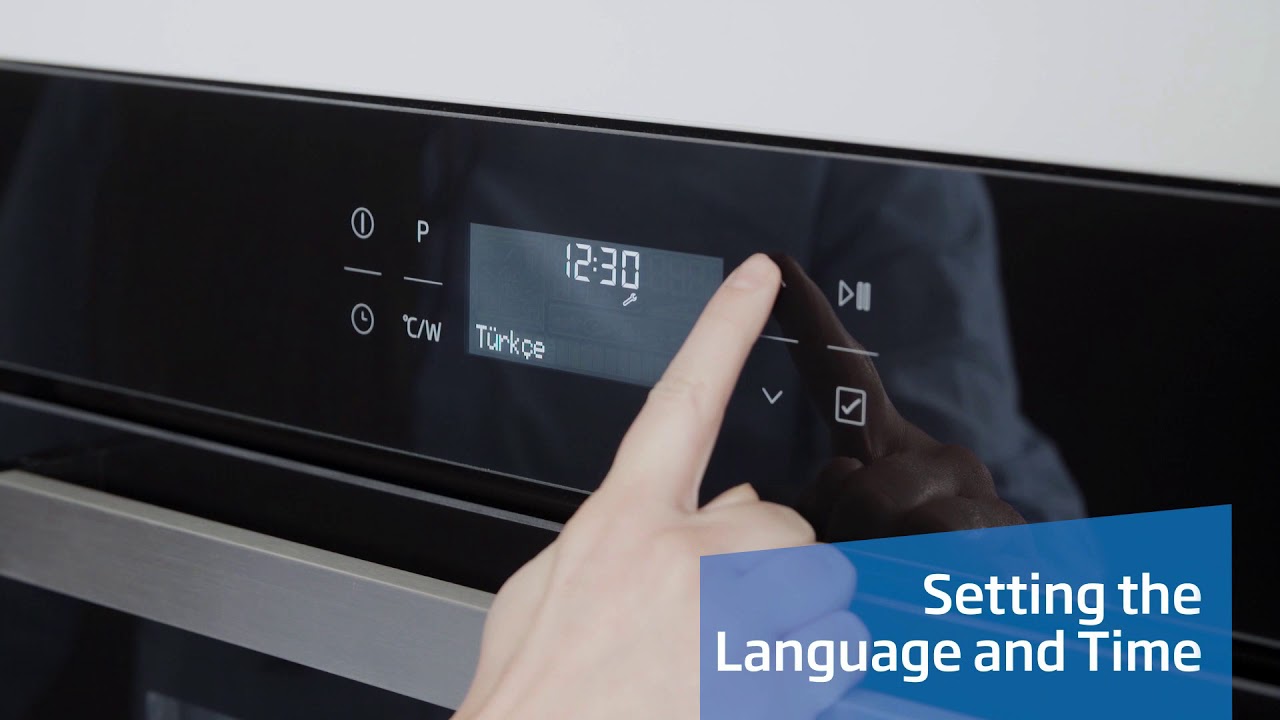
If you are using your oven for the first time, you will need to set the language first, and then the time. Watch the video above to see how to set your oven’s language and time. Or, follow these quick and easy steps to find out how to do this:
- ‘English’ will appear on the text display, if you want to change it, press the up or down key buttons until the display shows your language of preference
- Press the confirmation key to set the language
- Set the time by pressing the up or down keys buttons until the correct time is shown on the display
- Press the confirmation key to set the time
Setting the Alarm
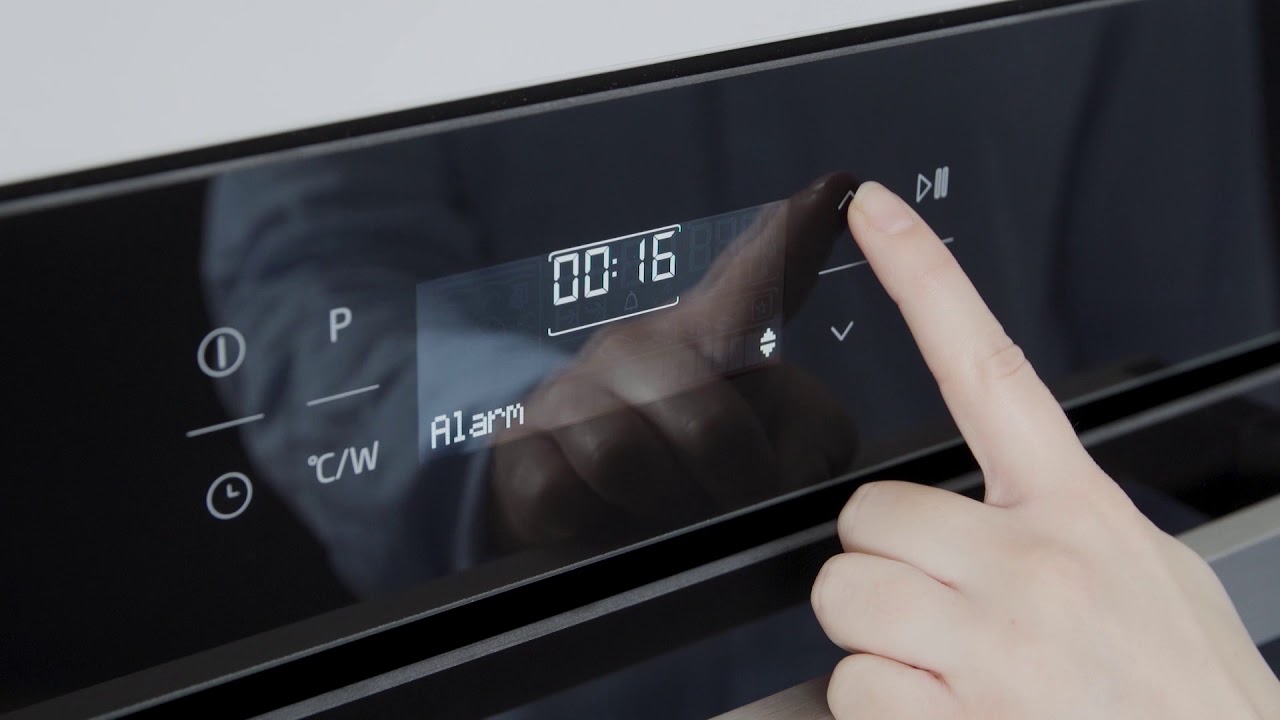
Did you know that you can use your oven’s alarm feature to help you time your cooked and baked foods perfectly? This is a helpful addition to your built-in oven which can help to stop you from under-cooking or over-cooking your food. Watch the video above to see how to set your oven’s alarm. Or, follow these quick and easy steps to find out how to do this:
- Press the timer button that looks like a clock in short intervals until ‘Alarm’ and the bell symbol appear on the display
- Set the alarm duration by using the up and down arrow keys
- As the time counts down, you’ll see the bell symbol on the display
- Once the time has reached its end, you’ll hear the alarm, and the bell symbol will flash
- To stop the alarm, press any key
Setting the Cooking Time
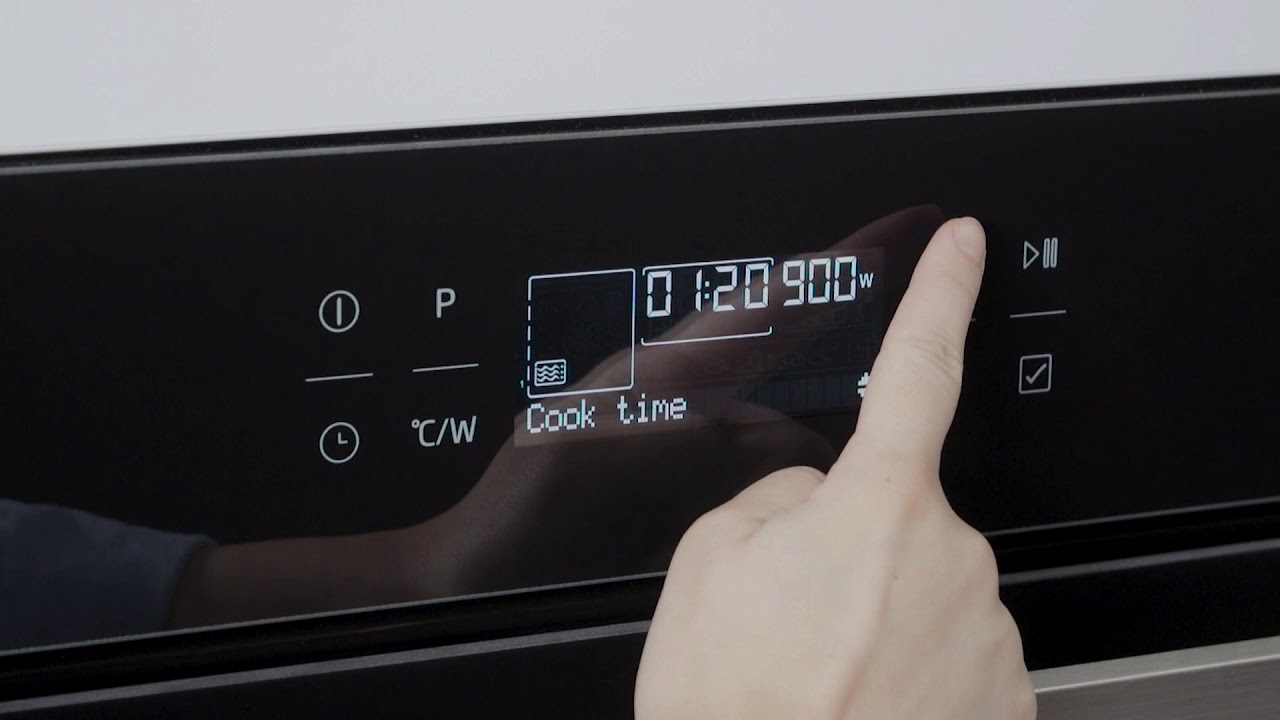
Another handy feature that comes with your oven’s animated Text LCD display is being able to set a cooking time for a duration you choose, so that your oven turns off once the timer has finished. This is such a great help for when you have a lot of things to do around your house, and don’t want to worry about your food over-cooking. Watch the video above to see how to set the cooking time for your food. Or, follow these quick and easy steps to find out how to do this:
- Press the clock key once to scroll to the ‘Cook time’ text on the display
- Press the up and down arrow keys to set the cooking duration
- The arrow symbol will appear continuously on the display
- Place your dish in the oven
- Set the temperature by pressing the temperature button once
- ‘Temperature’ will appear on the display
- Use the up and down arrow keys to select the required temperature
- Press the start/stop key and the word ‘Cooking’ will appear on the display
- Once the timer has counted down, you’ll hear the alarm and the oven will switch off
- To stop the alarm, press any button
If you have any questions regarding these steps, please feel free to contact our customer service team, with the model and serial number of your oven. They will be happy to assist you.
Did you find this How-To guide useful?
Thank you for your feedback and we are sorry this How-To Guide wasn’t useful to you. If you would like further assistance, please head over to our Contact Us page.
Need Product Support?
If you have any questions about your Beko appliance, we are here to help. Finding answers and information is easy with Beko’s helpful online resources, simply browse our product support topics below and select the one that is relevant to you.

Manuals
Beko manuals contain helpful information and advice about your appliance.
View Manuals
Parts & Accessories
We stock genuine Beko spare parts and accessories for all of our models.
View Range Now
FAQs
Browse the most asked questions about our product range.
Search FAQs
Repairs
Information on our professional repair services.
View Repairs